The translation was generated automatically and may contain mistakes
Android SDK
Start of work
Your audience is 59 There are millions of active VKontakte users who prefer Android every month.
You can create a brand new product or add VKontakte capabilities to an already existing application to increase user activity.
The SDK will help you quickly integrate the VKontakte API into your Android app.
The SDK simplifies the use of VKontakte APIs in Android applications. Users will be able to go through authorization without entering a login and password. After that, you can start using API methods right away.
Project page and source code on GitHub:
https://github.com/VKCOM/vk-android-sdk
Android versions are supported 5.0 and higher.
Documentation
- •Acquaintance with API — if you have not previously worked with the VKontakte API, before starting work, we recommend you to learn about the basic principles of its use.
- •Android SDK A guide to using the Android SDK for API VKontakte
SDK capabilities
Authorization through the official VKontakte
Offer the user to use an existing account — it is much easier than filling out the registration form, and you can get all the necessary data from his profile in the VK
Publication of content
Implement the ability to share with friends VKontakte interesting events, photos, videos - and your product will not go unnoticed.
Access to the social graph
Work with the connections and preferences of your customers. By analyzing the list of friends and communities, you can individually assess the needs of the user.
What else?
Audio, video, community administration, news feed, messaging — almost everything that is available in the full version of the VKontakte can be implemented using our API and using the SDK.
Examples of Use
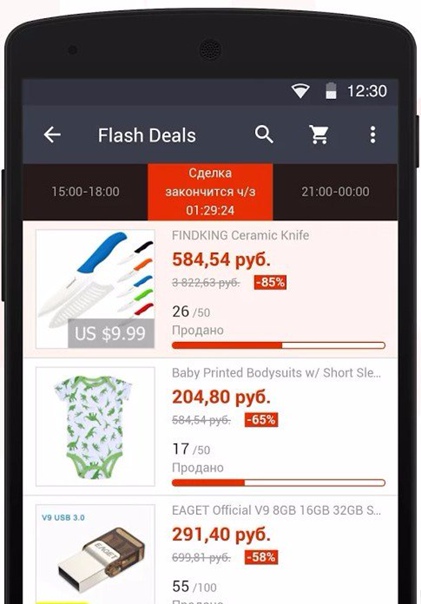 Application Screen
 Application Screen
Preparation for use
Before you start working with VK SDK you need to create Standalone application .
Save the ID of your application and fill in the fields “Package name for Android?2?, “Main Activity for Android?2?, “Certificate fingerprint for Android?2?.
Certificate fingerprint
To obtain a fingerprint of your certificate, you can use one of the following methods:
Receiving a print with keytool
You need to determine the location of the storage for the application. Debugging Key Vault ( debug ) is usually located in one of these directories:
~/.android/ для OS X и Linux
C:\Documents and Settings\<user>\.android\ для Windows XP,
C:\Users\<user>\.android\ для Windows Vista, Windows 7 и Windows 8.
The repository for the release version is usually created by the developer, so you have to create or remember its location yourself.
Once you have determined the location of your storage, use the utility keytool (Delivered in conjunction with the Java SDK). Get the list of keys with the following command:
keytool -exportcert -alias androiddebugkey -keystore path-to-debug-or-production-keystore -list -v
You should see something like:
Certificate fingerprint: SHA1: DA:39:A3:EE:5E:6B:4B:0D:32:55:BF:EF:95:60:18:90:AF:D8:07:09
By removing all colons, you will get a fingerprint of your key.
Printing with SDK
If you have already added an SDK to your project, you can use the following feature in any activity of your application.
String[] fingerprints = VKUtils.getCertificateFingerprint(this, this.getPackageName());
Usually, fingerprints contains one line that will be the fingerprint of your certificate (depending on which certificate the application was signed with).
Receiving a fingerprint through Android Studio
Click on the right menu in the tab Gradle (or double-click Shift and write Gradle). Open the root folder of your project, then open Tasks And then Android. Run the task signingReport . Find your SHA1 fingerprint in the tab Run .
In the application settings, you can add several prints, for example,
debugandrelease.
Connection in the Annex
We prefer Android Studio, so we focus primarily on it.
Connecting as a Maven Artifact
android-sdk-core on Maven. You can add the following dependencies to your project/build.gradle file:
- •android-sdk-core: basic functionality (required).
- •android-sdk-api: generated models and methods.
- •androidsdk: An outdated copy of android-sdk-core (to be removed).
- •androidsdkapi: An outdated copy of android-sdk-api (to be removed).
For example, your app/build.gradle script will contain the following dependencies:
dependencies {
    implementation 'com.vk:android-sdk-core:4.1.0',
    implementation 'com.vk:android-sdk-api:4.1.0'
}
You can find older versions of the SDK.. here.. .
Working with SDK
SDK Initialization
- 1.Add permission to
AndroidManifest.xmlXML<uses-permission android:name="android.permission.INTERNET"/> - 2.Add this to the resource file (for example
strings.xml)XML<integer name="com_vk_sdk_AppId">your_app_id</integer>
User authorization
If the user has a VKontakte application installed, then authorization will pass through it without entering a login and password.
Use the VK.login method
VK.login(activity, arrayListOf(VKScope.WALL, VKScope.PHOTOS))Override onActivityResult :
'''Kotlin
override fun onActivityResult(requestCode: Int, resultCode: Int, data: Intent?) {
val callback = object: VKAuthCallback {
override fun onLogin(token: VKAccessToken) {
// User passed authorization
}
override fun onActivityResult(requestCode: Int, resultCode: Int, data: Intent?) {
val callback = object: VKAuthCallback {
override fun onLogin(token: VKAccessToken) {
// User passed authorization
}
// User didn't pass authorization
 }
 }
 if (data == null || !VK.onActivityResult(requestCode, resultCode, data, callback)) {
 super.onActivityResult(requestCode, resultCode, data)
 }
}```
Если у пользователя не установлено приложение ?1?’Контакте, то SDK будет использовать авторизацию через новую Activity при помощи OAuth.
Обработка авторизации токена
Создайте экземпляр VKTokenExpiredHandler:
class SampleApplication: Application() {
    override fun onCreate() {
        super.onCreate()
        VK.addTokenExpiredHandler(tokenTracker)
    }

    private val tokenTracker = object: VKTokenExpiredHandler {
        override fun onTokenExpired() {
            // token expired
        }
    }
}
Calling API Methods
To access the API, you can use both the methods built into the SDK and your library after receiving the access key.
Execute requests with VK.execute:
'''Kotlin VK.execute(UsersGet(), object: VKApiCallback<List> { override fun success(result: List) { } override fun fail(error: VKApiExecutionException) { } })
Если вы используете RxJava в вашем проекте, вы можете сделать что-то вроде этого:
```Kotlin
Observable.fromCallable {
    VK.executeSync(VKUsersRequest())
}
    .subscribeOn(Schedulers.single())
    .observeOn(AndroidSchedulers.mainThread())
    .subscribe({
        // response here
    }, {
        // throwable here
    })
If you want a more complex query, you need to override the ApiCommand. This approach will allow you to make multiple requests at once.
class VKUsersCommand(private val uids: IntArray = intArrayOf()): ApiCommand<List<VKUser>>() {
    override fun onExecute(manager: VKApiManager): List<VKUser> {

        if (uids.isEmpty()) {
            // if no uids, send user's data
            val call = VKMethodCall.Builder()
                    .method("users.get")
                    .args("fields", "photo_200")
                    .version(manager.config.version)
                    .build()
            return manager.execute(call, ResponseApiParser())
        } else {
            val result = ArrayList<VKUser>()
            val chunks = uids.toList().chunked(CHUNK_LIMIT)
            for (chunk in chunks) {
                val call = VKMethodCall.Builder()
                        .method("users.get")
                        .args("user_ids", chunk.joinToString(","))
                        .args("fields", "photo_200")
                        .version(manager.config.version)
                        .build()
                result.addAll(manager.execute(call, ResponseApiParser()))
            }
            return result
        }
    }

    companion object {
        const val CHUNK_LIMIT = 900
    }

    private class ResponseApiParser : VKApiResponseParser<List<VKUser>> {
        override fun parse(response: String): List<VKUser> {
            try {
                val ja = JSONObject(response).getJSONArray("response")
                val r = ArrayList<VKUser>(ja.length())
                for (i in 0 until ja.length()) {
                    val user = VKUser.parse(ja.getJSONObject(i))
                    r.add(user)
                }
                return r
            } catch (ex: JSONException) {
                throw VKApiIllegalResponseException(ex)
            }
        }
    }
}
VKUsersCommand Supports chunking to work with API limits. This is the main difference VKUsersRequest from VKUsersCommand .
You can also check VKWallPostCommand . This is an example of a complex API request to load a file.
Preparing requests
- 1.
A simple request.
VKRequest request = VKApi.users().get(); - 2.
Query with parameters.
VKRequest request = VKApi.users().get(VKParameters.from(VKApiConst.USER_IDS, "1,2")); - 3.
http download option (if you are logged in to
scopewas transferredVK_PER_NOHTTPS).VKRequest request = VKApi.users().get(VKParameters.from(VKApiConst.USER_IDS, "1,2")); request.secure = NO; - 4.
Request with number of repetitions.
VKRequest request = VKApi.wall().post(VKParameters.from(VKApiConst.OWNER_ID, "-60479154", VKApiConst.MESSAGE, "Привет, друзья!"));
request.attempts = 10;
//or infinite
//postReq.attempts = 0;
10 requests will be executed until success occurs or the API error is returned.
- 1.
Arbitrary loading aPI method (It should be noted that received
scope).VKRequest request = new VKRequest("friends.get", VKParameters.from(VKApiConst.FIELDS, "sex,bdate,city")); - 2.
Uploading a photo on the VK server.
final Bitmap photo = getPhoto();
VKRequest request = VKApi.uploadWallPhotoRequest(new VKUploadImage(photo, VKImageParameters.jpgImage(0.9f)), 0, 60479154);
Sending a request
request.executeWithListener(new VKRequestListener() {
@Override
public void onComplete(VKResponse response) {
//Do complete stuff
}
@Override
public void onError(VKError error) {
//Do error stuff
}
@Override
public void attemptFailed(VKRequest request, int attemptNumber, int totalAttempts) {
//I don't really believe in progress
}
});
Packet processing of requests
The SDK allows multiple methods to be executed in a single request.
- 1.
Required requests are made:
VKRequest request1 = VKApi.uploadWallPhotoRequest(new VKUploadImage(photo1, VKImageParameters.jpgImage(0.9f)), 0, 60479154); VKRequest request2 = VKApi.uploadWallPhotoRequest(new VKUploadImage(photo2, VKImageParameters.jpgImage(0.5f)), 0, 60479154); VKRequest request3 = VKApi.uploadWallPhotoRequest(new VKUploadImage(photo3, VKImageParameters.jpgImage(0.1f)), 0, 60479154); VKRequest request4 = VKApi.uploadWallPhotoRequest(new VKUploadImage(photo4, VKImageParameters.pngImage()), 0, 60479154); - 2.
The necessary requests are combined into one.
VKBatchRequest batch = new VKBatchRequest(request1, request2, request3, request4); - 3.
The request is loaded in a standard way.
batch.executeWithListener(new VKBatchRequestListener() {
@Override
public void onComplete(VKResponse[] responses) {
super.onComplete(responses);
String[] photos = new String[responses.length];
for (int i = 0; i < responses.length; i++) {
VKPhoto photoModel = ((VKPhotoArray) responses[i].parsedModel).get(0);
photos[i] = String.format("photo%s_%s", photoModel.owner_id, photoModel.id);
}
makePost(VKStringJoiner.join(photos, ","));
}

@Override
public void onError(VKError error) {
showError(error);
}
});